-40%
Stainless Exhaust Manifold Gasket For 93-98 Jeep Grand Cherokee 4.0L L6 25962523
$ 43.29
- Description
- Size Guide
Description
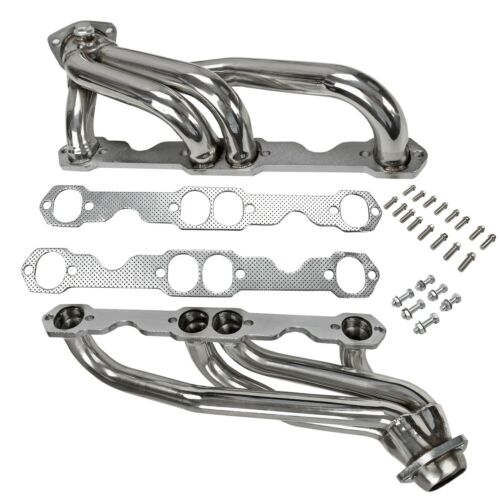
Stainless Exhaust Manifold Gasket For 93-98 Jeep Grand Cherokee 4.0L L6 25962523Application For
For 1991-99 Jeep Cherokee L6 4.0L For 1991-92 Jeep Comanche (MJ) L6 4.0L For 1993-98 Jeep Grand Cherokee L6 4.0L For 1997-99 Jeep Wrangler L6 4.0L For 1991-95 Jeep Wrangler L6 4.0L
Package included
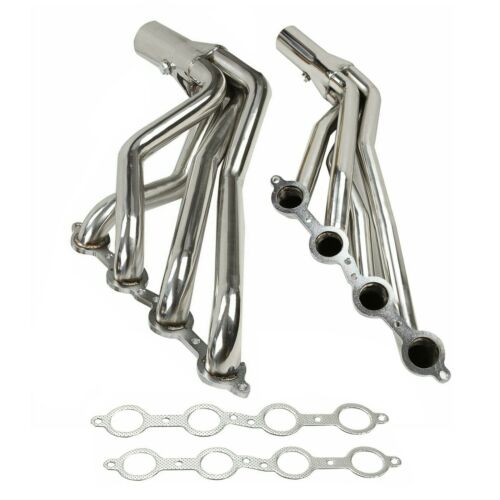
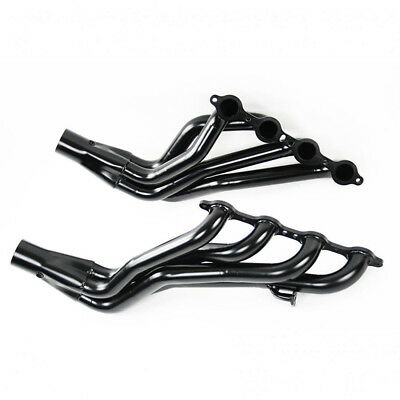
1 Set of Header Exhaust System
Installion
Step 1:Safety comes first. Let your vehicle cool down completely before wrenching. Once the heat's gone, jack up the vehicle and secure it with jack stands and wheel chocks. Your owner’s manual should tell you where your jack points are.
Stainless Exhaust Manifold Gasket For 93-98 Jeep Grand Cherokee 4.0L L6 25962523
Stainless Exhaust Manifold Gasket For 93-98 Jeep Grand Cherokee 4.0L L6 25962523
Application For
For 1991-99 Jeep Cherokee L6 4.0L
For 1991-92 Jeep Comanche (MJ) L6 4.0L
For 1993-98 Jeep Grand Cherokee L6 4.0L
For 1997-99 Jeep Wrangler L6 4.0L
For 1991-95 Jeep Wrangler L6 4.0L
Package included
1 Set of Header Exhaust System
Installion
Step 1:
Safety comes first
. Let your
vehicle cool down completely
before wrenching. Once the heat's gone, jack up the vehicle and secure it with jack stands and wheel chocks. Your owner’s manual should tell you where your jack points are.
Step 2:
Crawl or creep under the car and disconnect the header pipes
from your exhaust manifolds. If you don't want your exhaust to hang, bring a box with you to prop it up.
Step 3:While you're still under the car, take a look to
make sure there are
no components blocking the exhaust manifold or connected from below
.
Step 4:Climb out from under your vehicle and head for the engine compartment to
disconnect all sensors and tubes from the exhaust manifold
.
Step 5:
Unbolt the manifold from your engine block
, noting which bolt came from which location. You might have to spray the bolts with a penetrating fluid to cut through any accumulated crud or corrosion. If you're reusing the factory bolts, make sure they aren,t stripped, that the tread is true and that they’re in good condition.
Step 6:Once the bolts are out,
lower the manifold down through the engine compartment
.
Step 7:With the manifold out,
remove the gasket from around the exhaust port flange
. Give the flange surface a thorough cleaning and install the new gasket.
Step 8:
Sliding the headers into position
. Depending on the shape, you might be able to guide it in from above. More likely than not, you'll have to slip it in the same way the manifold came out—from below. This is usually the point where you call a buddy for a second set of hands.
Step 9:After it's in position,
loosely bolt the headers into place
—keeping them loose lets you wiggle the headers around if things aren't all lining up. Pulling the header away from the engine block can help lend clearance to start the bolts.
Step 10:As soon as it's aligned and all the bolts are threaded, tighten them down and then torque them to the specs noted in the installation instructions. When torqueing, be sure to start with the center bolts and work outwards in a spiral pattern.
Step 11:
Reconnect all the sensors and tubes
that you disconnected in Step 4.
Step 12:
Crawl back under your vehicle and bolt your exhaust system to your new headers
and make sure everything is
secure underneath.
Safely jack the vehicle down.
Step 13:
Climb in, fire it up and wake the neighbors
. Your new headers are roaring to go, but keep an eye out for exhaust leaks around the connection points—and speed traps around town.
Right after installation, you may see smoke and smell fumes coming from the new headers. Never fear—your headers are just burning off the protective oil-based coating used in the manufacturing and packing processes. Once those tubes reach normal operating temperatures, the smoke will disappear, leaving only performance in its wake.
Note
Sometimes it's a good idea to
heat cycle the headers a few times and revisit your install a day or two later
to ensure all the fasteners are still tight and the header flange is flush with the side of the cylinder head. Heat cycling simply involves bringing the headers up to operating temperature, then back down to ambient (outside) temperatures, multiple times.
Please check the complete Year, Make, Model, Trim, and Engine Size of your vehicle in the Compatibility Chart before Purchase.
Professional Installation is Highly Recommended(Installation Instruction is NOT Included).
If you have any question,please contact us.
Item Specifics
UPC :
Does not apply
Brand :
auspartshouse
Manufacturer Part Number :
9872015
Fitment Type :
Direct Replacement
Warranty :
2 Year
Mounting Hardware Included :
Yes
Material :
Stainless Steel
Modified Item :
No
Manifold Type :
Turbo
Color :
Sliver
Surface Finish :
Chrome
O2 Sensor Insertion :
Yes
Package included :
1 Exhaust Manifold & Gasket Kit
Placement on Vehicle :
Front
Interchange Part Number :
674-196, 25962523
Other Part Number :
10105812,4883385
Connection Type :
2 Bolt
Payment
We use eBay's Safe and Secure Checkout. Just click the Pay Now button at the top of any of the auctions you have won.
To pay for multiple auctions, successfully win all auctions you wish to purchase and then click the Pay Now button on any of the listings you won. You will only have to checkout and pay once for your entire order.
Please review our detailed policies on shipping and fixing any issues before purchasing the item. If you have any questions, please email us through "Ask a question".
Payment Options: Paypal, Visa, Mastercard, American Express, and Discover.
4.Payment must be received within 10 days as auction ended or order might be delayed.
1.We only accept PayPal.
2.Please do not use the PayPal note field to indicate us to ship to other address. The note there will NOT be read. If you want to change the shipping address, please contact us by eBay messages.
3.(if you want cancel orders or change address pls contact us within 6 hours after payment,or we are not responsible for shipping a replacement.)
4.Payment must be received within 10 days as auction ended or order might be delayed.1.We only accept PayPal.
2.Please do not use the PayPal note field to indicate us to ship to other address. The note there will NOT be read. If you want to change the shipping address, please contact us by eBay messages.
3.(if you want cancel orders or change address pls contact us within 6 hours after payment,or we are not responsible for shipping a replacement.)
4.Payment must be received within 10 days as auction ended or order might be delayed.
Shipping
1. Orders processed within 24 hours of payment verification.
2. We only ship to confirmed PAYPAL addresses. Your PAYPAL address must match your Shipping address.
3. The images shown are not the actual item and are for your reference only.
4. If you have not received your shipment within 15 days from payment , please contact us. We will track the shipment and get back to you as soon as possible with a reply. Our goal is customer satisfaction!
Returns
1. You have 30 days to contact us and 10 days to return it from the date it was received. If this item is in your possession more than 7 days, it is considered used and we will not issue you a refund or replacement. There are NO EXCEPTIONS!
2. All returned items must be in the original packaging and you must provide us with the shipping tracking number, specific reason for the return, and item custom lable.
3. We will refund your full winning bid amount, upon receipt of the item in its original condition and packaging with all components and accessories included, AFTER both Buyer and Seller cancel the transaction from eBay. OR, you may choose to have a replacement.
4. Return shipping is to be paid by the Buyer.
Feedback
We maintain high standards of excellence (five stars review)and strive for 100% customer satisfaction! FEEDBACK IS VERY IMPORTANT TO US. We request that you contact us immediately BEFORE you give us neutral or negative feedback, so that we can satisfactorily address your concerns.
Stainless Exhaust Manifold Gasket For 93-98 Jeep Grand Cherokee 4.0L L6 25962523
Stainless Exhaust Manifold Gasket For 93-98 Jeep Grand Cherokee 4.0L L6 25962523
Application For
For 1991-99 Jeep Cherokee L6 4.0L
For 1991-92 Jeep Comanche (MJ) L6 4.0L
For 1993-98 Jeep Grand Cherokee L6 4.0L
For 1997-99 Jeep Wrangler L6 4.0L
For 1991-95 Jeep Wrangler L6 4.0L
Package included
1 Set of Header Exhaust System
Installion
Step 1:
Safety comes first
. Let your
vehicle cool down completely
before wrenching. Once the heat's gone, jack up the vehicle and secure it with jack stands and wheel chocks. Your owner’s manual should tell you where your jack points are.
Step 2:
Crawl or creep under the car and disconnect the header pipes
from your exhaust manifolds. If you don't want your exhaust to hang, bring a box with you to prop it up.
Step 3:While you're still under the car, take a look to
make sure there are
no components blocking the exhaust manifold or connected from below
.
Step 4:Climb out from under your vehicle and head for the engine compartment to
disconnect all sensors and tubes from the exhaust manifold
.
Step 5:
Unbolt the manifold from your engine block
, noting which bolt came from which location. You might have to spray the bolts with a penetrating fluid to cut through any accumulated crud or corrosion. If you're reusing the factory bolts, make sure they aren,t stripped, that the tread is true and that they’re in good condition.
Step 6:Once the bolts are out,
lower the manifold down through the engine compartment
.
Step 7:With the manifold out,
remove the gasket from around the exhaust port flange
. Give the flange surface a thorough cleaning and install the new gasket.
Step 8:
Sliding the headers into position
. Depending on the shape, you might be able to guide it in from above. More likely than not, you'll have to slip it in the same way the manifold came out—from below. This is usually the point where you call a buddy for a second set of hands.
Step 9:After it's in position,
loosely bolt the headers into place
—keeping them loose lets you wiggle the headers around if things aren't all lining up. Pulling the header away from the engine block can help lend clearance to start the bolts.
Step 10:As soon as it's aligned and all the bolts are threaded, tighten them down and then torque them to the specs noted in the installation instructions. When torqueing, be sure to start with the center bolts and work outwards in a spiral pattern.
Step 11:
Reconnect all the sensors and tubes
that you disconnected in Step 4.
Step 12:
Crawl back under your vehicle and bolt your exhaust system to your new headers
and make sure everything is
secure underneath.
Safely jack the vehicle down.
Step 13:
Climb in, fire it up and wake the neighbors
. Your new headers are roaring to go, but keep an eye out for exhaust leaks around the connection points—and speed traps around town.
Right after installation, you may see smoke and smell fumes coming from the new headers. Never fear—your headers are just burning off the protective oil-based coating used in the manufacturing and packing processes. Once those tubes reach normal operating temperatures, the smoke will disappear, leaving only performance in its wake.
Note
Sometimes it's a good idea to
heat cycle the headers a few times and revisit your install a day or two later
to ensure all the fasteners are still tight and the header flange is flush with the side of the cylinder head. Heat cycling simply involves bringing the headers up to operating temperature, then back down to ambient (outside) temperatures, multiple times.
Please check the complete Year, Make, Model, Trim, and Engine Size of your vehicle in the Compatibility Chart before Purchase.
Professional Installation is Highly Recommended(Installation Instruction is NOT Included).
If you have any question,please contact us.
Item Specifics
Brand :
auspartshouse
Manufacturer Part Number :
9872015
Fitment Type :
Direct Replacement
Warranty :
2 Year
Mounting Hardware Included :
Yes
Material :
Stainless Steel
Modified Item :
No
Manifold Type :
Turbo
Color :
Sliver
Surface Finish :
Chrome
O2 Sensor Insertion :
Yes
Package included :
1 Exhaust Manifold & Gasket Kit
Placement on Vehicle :
Front
Interchange Part Number :
674-196, 25962523
Other Part Number :
10105812,4883385
Connection Type :
2 Bolt
Payment
Shipping
Returns
Feedback
We use eBay's Safe and Secure Checkout. Just click the Pay Now button at the top of any of the auctions you have won.
To pay for multiple auctions, successfully win all auctions you wish to purchase and then click the Pay Now button on any of the listings you won. You will only have to checkout and pay once for your entire order.
Please review our detailed policies on shipping and fixing any issues before purchasing the item. If you have any questions, please email us through "Ask a question".
Payment Options: Paypal, Visa, Mastercard, American Express, and Discover.
4.Payment must be received within 10 days as auction ended or order might be delayed.
1.We only accept PayPal.
2.Please do not use the PayPal note field to indicate us to ship to other address. The note there will NOT be read. If you want to change the shipping address, please contact us by eBay messages.
3.(if you want cancel orders or change address pls contact us within 6 hours after payment,or we are not responsible for shipping a replacement.)
4.Payment must be received within 10 days as auction ended or order might be delayed.1.We only accept PayPal.
2.Please do not use the PayPal note field to indicate us to ship to other address. The note there will NOT be read. If you want to change the shipping address, please contact us by eBay messages.
3.(if you want cancel orders or change address pls contact us within 6 hours after payment,or we are not responsible for shipping a replacement.)
4.Payment must be received within 10 days as auction ended or order might be delayed.1.We only accept PayPal.
2.Please do not use the PayPal note field to indicate us to ship to other address. The note there will NOT be read. If you want to change the shipping address, please contact us by eBay messages.
3.(if you want cancel orders or change address pls contact us within 6 hours after payment,or we are not responsible for shipping a replacement.)
4.Payment must be received within 10 days as auction ended or order might be delayed.
1. Orders processed within 24 hours of payment verification.
2. We only ship to confirmed PAYPAL addresses. Your PAYPAL address must match your Shipping address.
3. The images shown are not the actual item and are for your reference only.
4. If you have not received your shipment within 15 days from payment , please contact us. We will track the shipment and get back to you as soon as possible with a reply. Our goal is customer satisfaction!
1. You have 30 days to contact us and 10 days to return it from the date it was received. If this item is in your possession more than 7 days, it is considered used and we will not issue you a refund or replacement. There are NO EXCEPTIONS!
2. All returned items must be in the original packaging and you must provide us with the shipping tracking number, specific reason for the return, and item custom lable.
3. We will refund your full winning bid amount, upon receipt of the item in its original condition and packaging with all components and accessories included, AFTER both Buyer and Seller cancel the transaction from eBay. OR, you may choose to have a replacement.
4. Return shipping is to be paid by the Buyer.
We maintain high standards of excellence (five stars review)and strive for 100% customer satisfaction! FEEDBACK IS VERY IMPORTANT TO US. We request that you contact us immediately BEFORE you give us neutral or negative feedback, so that we can satisfactorily address your concerns.
Copyright of e-millionstore. All rights reserved.
Shop Category
Store Home
Wheels
Wheel Spacers
3rd Brake Light
LED Instrument Light
Tire Pressure Sensor
Fastener
Sun Visor
Ballast module
Rubber Seal Strip
blow off valve
ATV Brake Caliper
Ignition Distributor
Thermostat Housing
Coilover
Ignition Coil
LED Whip Light
Other
Hot Item
4-1 Shorty Exhaust Manifold Header&Collectors For 82-04 GMC Sonoma S15 Chevy S10
USD 127.99
3" Inlet 4" Outlet 12" Long Sliver Round Stainless Steel Exhaust Tip weld on
USD 34.99
4-2-1 Stainless Manifold Exhaust/Header For 94-01 Acura Integra LS/GS/RS 1.8L L4
USD 82.99
4-1 Racing Header Exhaust Manifold For 66-96 Small Block Chevy Chevrolet Camaro
USD 120.99
4-2-1 Racing Header Exhaust/Manifold For 02-07 Mitsubishi Lancer 4 Cylinder 2.0L
USD 121.99
New List Item
Front Left Right Power Window Regulator For 11-12 Chevy Cruze W/ Motor 75226747
USD 83.99
Rear Wheel Bearing & Hub Fits Buick Regal Chevrolet Impala Pontiac Aztek 5 Lugs
USD 49.99
Window Regulator For 1994-1997 Town Car Front Left Right Power With Motor 741663
USD 89.99
Engine Oil Pan Gasket Fits Chevrolet Cavalier S10 GMC Sonoma Isuzu Hombre
USD 20.99
Rear Wheel Hub & Bearing For Nissan Sentra 2007-2012 4 Lugs Left And Right Side
USD 49.99

